
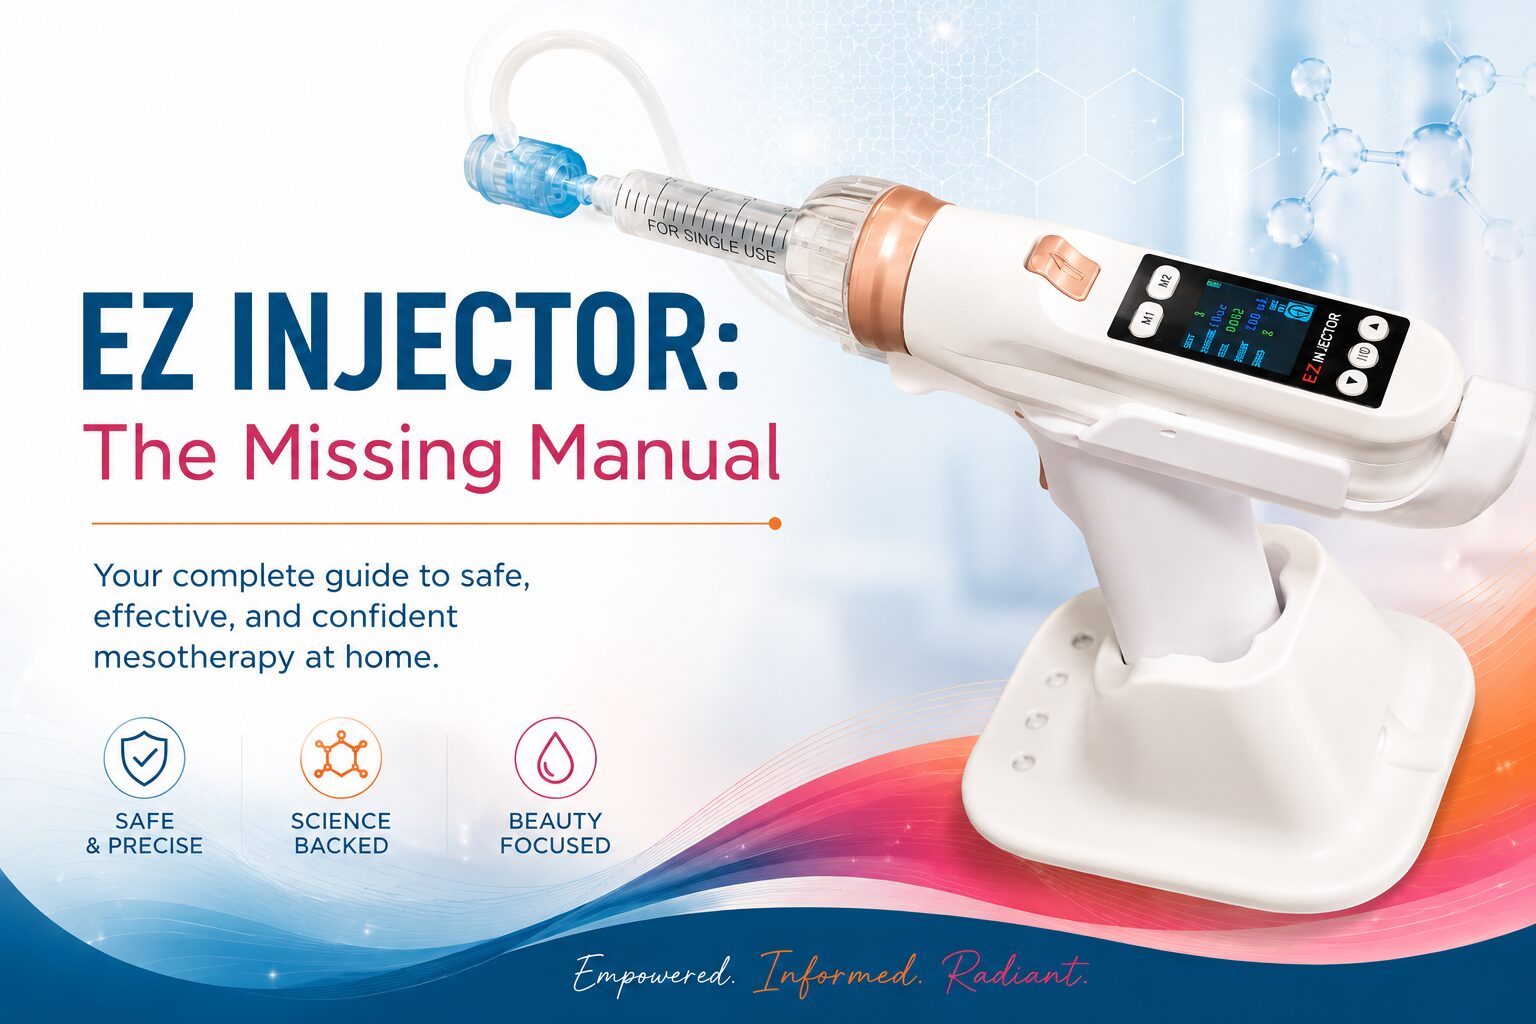
Manual mesotherapy can produce beautiful results, but it demands steady hands, consistent depth, and precise dosing hundreds of times during a treatment. The EZ Injector was designed to automate those variables, delivering skin boosters with remarkable consistency while reducing both the skill and hand fatigue required for larger treatments. Its built-in vacuum system stabilizes the skin when used with multi-pin cartridges, while its single-needle mode allows you to manually control depth and angle for more targeted injections.
On paper, it sounds like the perfect DIY tool. In reality, buying the machine is only half the battle. The included instructions are minimal, most tutorials focus only on basic setup, and many of the best tips are scattered across videos, forums, and social media comments. New users often find themselves staring at confusing settings, wondering why product is leaking everywhere, or trying to decipher what the machine is actually doing.
This guide is my attempt to put all of that knowledge in one place. It combines the fundamentals of operating the EZ Injector with practical lessons gathered from experienced users, troubleshooting techniques I’ve personally tested, and the little tricks that transform the device from a frustrating gadget into one of the most useful tools in my DIY arsenal. Whether you’re assembling it for the first time or trying to perfect your technique after several sessions, my goal is to give you a refererence you’ll come back to before every treatment.
Part 1: The Sourcing & Supply Guide
Before you perform your first treatment, you need to gather the correct consumables. Platforms like AliExpress are usually the best bet for finding these specific items.
Pro-Tip for Sourcing: When searching AliExpress for consumables, look for both brands EZ Injector and Haifeel. These brands use completely interchangeable needle cartridges, syringes, and vacuum tubes.
1. Specialized EZI Syringes (Hollow Barrels)
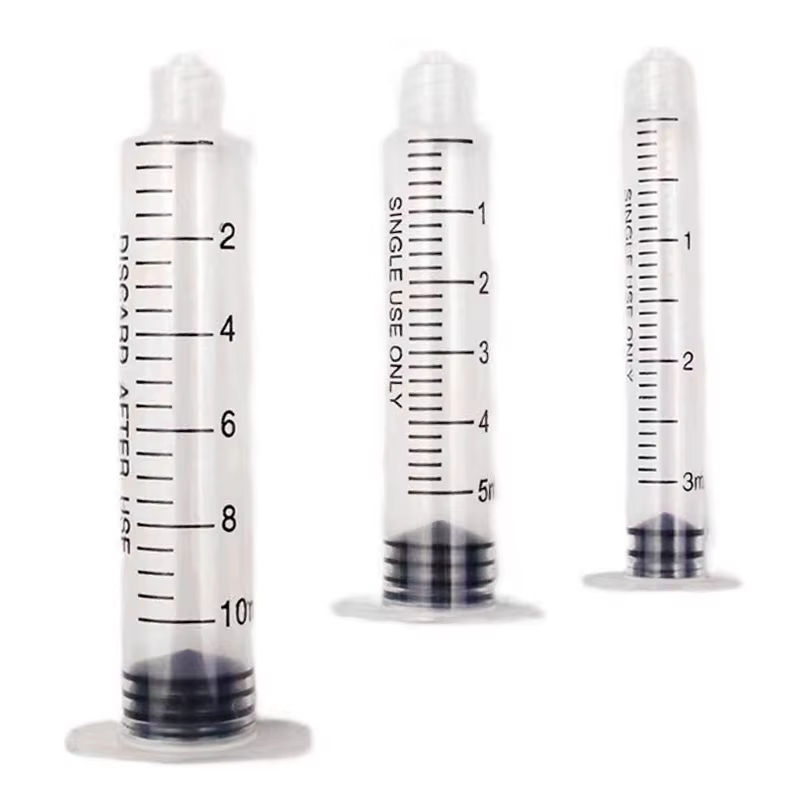
You cannot use standard medical syringes because EZ Injector syringes lack a manual thumb plunger. Instead, the device features a metal drive rod that physically screws into the back of the syringe’s rubber stopper. These special syringes are sold in 1mL, 3mL, 5mL, and 10mL sizes (note that the machine’s screen uses “cc”, which is identical to “mL”).
2. Needle Cartridges
If you plan to use the device in its gun handle with the vacuum feature, you need multi-pin cartridges. Note that needle cartridges are single treatment only and are absolutely not reusable.
- 9-Pin Cartridges: The most popular choice. The 9-pin is a fine 32G and has an adjustable depth up to 2.5mm deep by twisting the dial on the cartridge. Because the force is spread across 9 concentrated pins, the skin creates a bit more collective resistance, making it the comfortable choice for thinner skin boosters where you want rapid surface area coverage in the mid-to-deep dermis.
Look for the Conpuvon brand for high quality pins with depth markings; most generic cartridges do not have depth markings, so you have to eyeball it unless you extend it to the maximum depth. - 5-Pin Cartridges: One of these will come with your new EZ Injector. These have slightly more spacing between pins and fewer channels. The smaller footprint of the head makes it convenient for maneuvering around tight spaces on the face, like the sides of the nose or around the mouth.
Note an important design difference: unlike the 9-pin, these are a fixed, unadjustable 32G needle at exactly 1.5mm length.
If you find the 5-pin feels sharper or hurts a bit more than the 9-pin, you aren’t imagining things. This happens because of the “bed of nails” physics principle, the fakir effect. When the vacuum pulls your skin against the cartridge, the injector’s forward force is concentrated onto fewer points. With less surface resistance, the fixed 1.5mm 5-pin punctures the tissue effortlessly and will plunge straight to its full depth with almost no skin pushback. - 16-Pin Cartridges: Made by Compuvon, they are relatively rare and are most suitable for large body areas rather than delicate facial work.
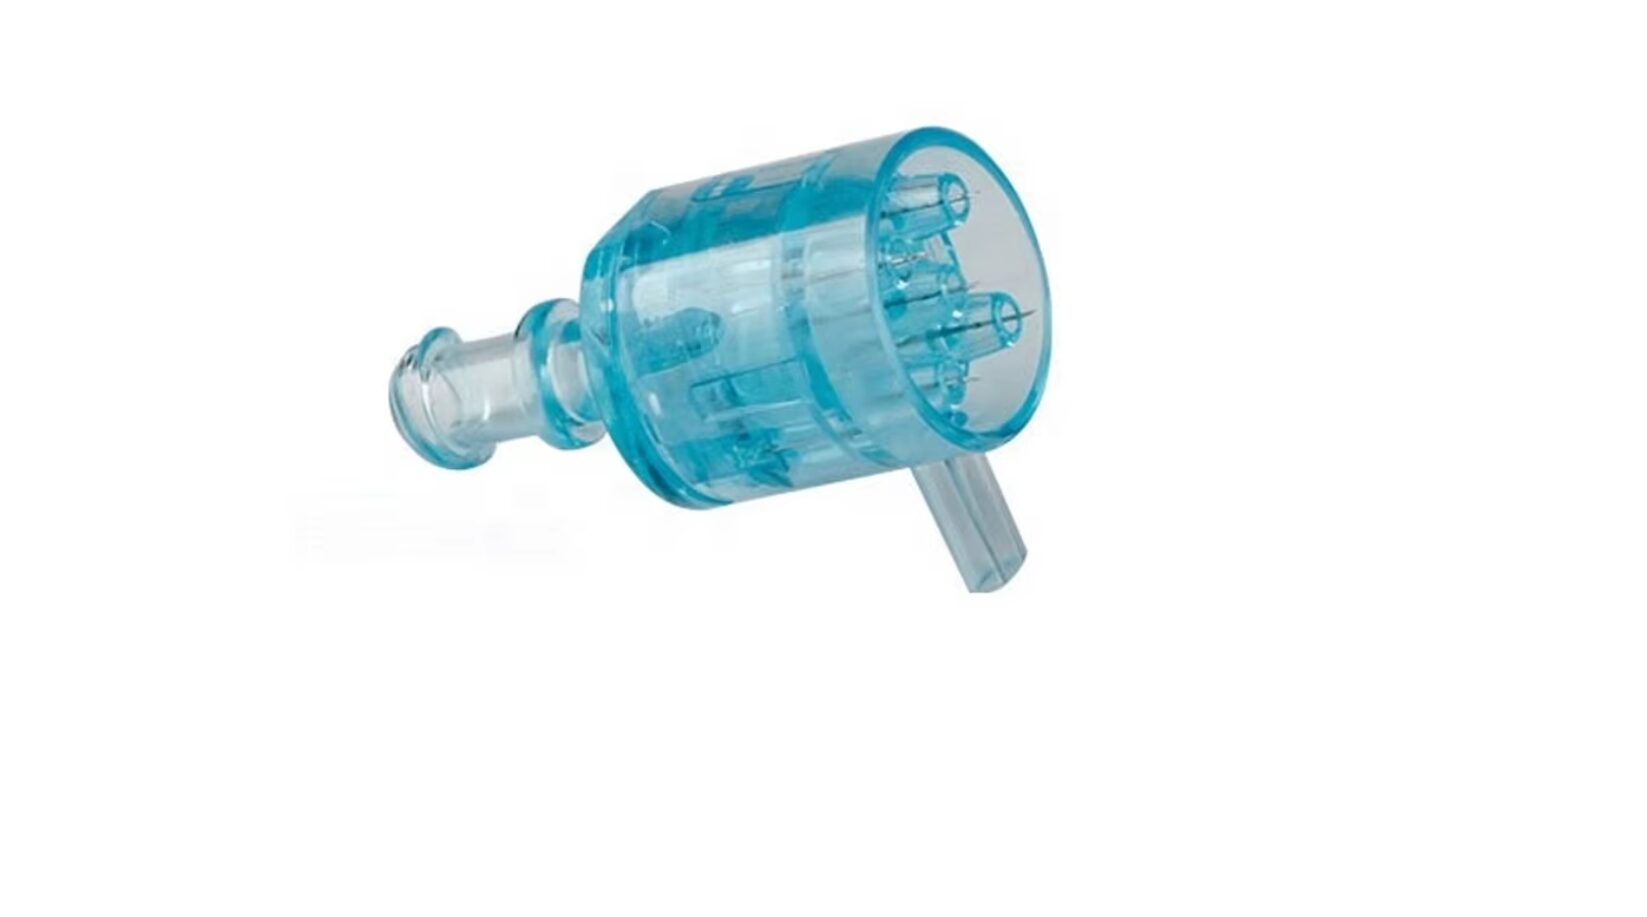
5-Pin Generic
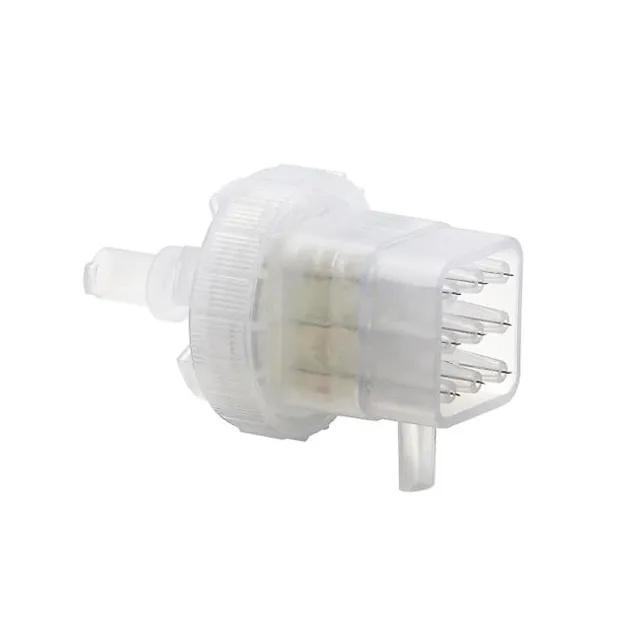
9-Pin Generic
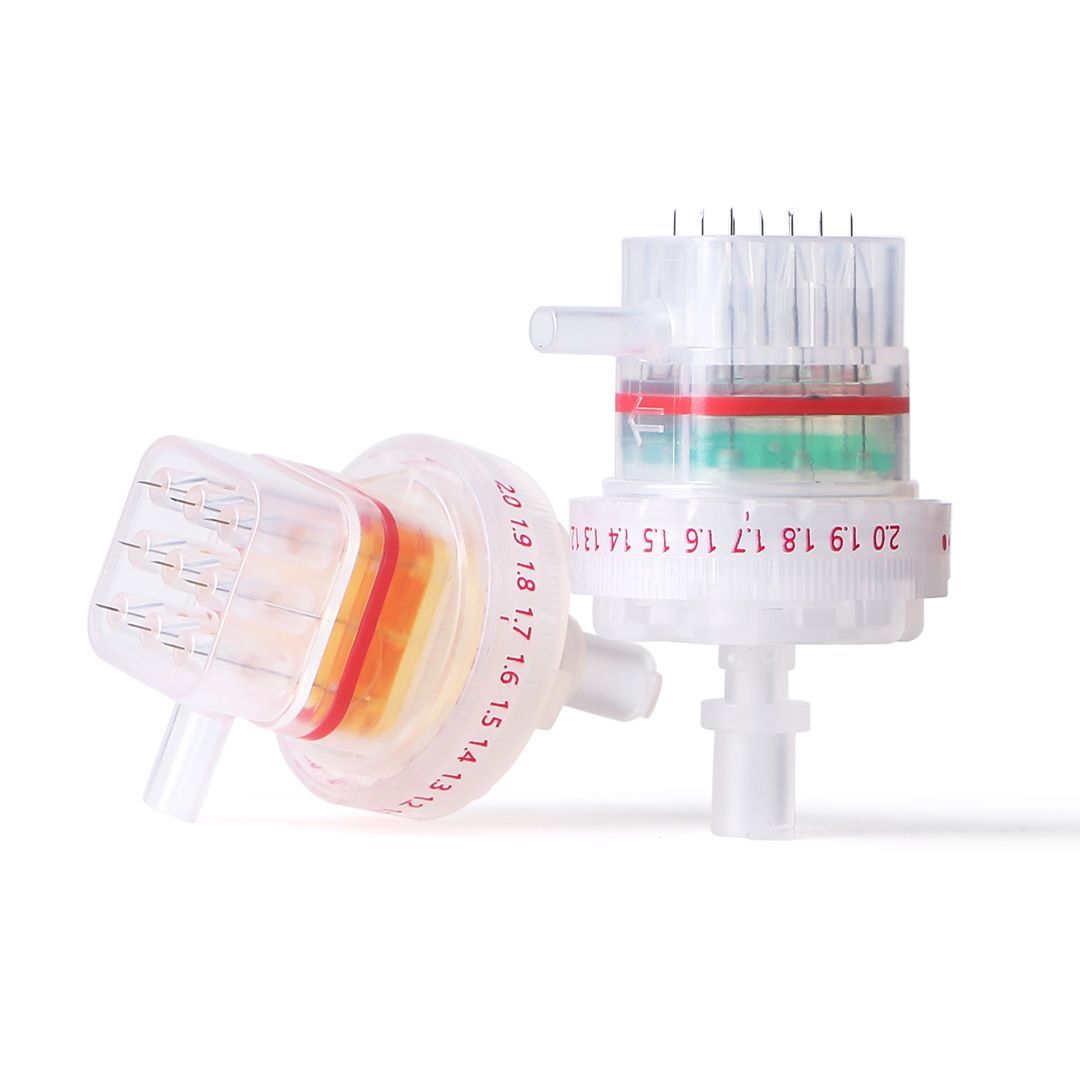
9-Pin Compuvon
3. Vacuum and Filter Consumables
Multi-pin cartridges feature a small side-port. You must purchase the tiny clear PVC vacuum tubes and round hydrophobic filters that connect the cartridge to the gun handle. The filter acts as a physical shield, stopping liquid from being sucked into the machine’s internal motor.
4. Single Needles
If you intend to use the EZ Injector in single needle mode, you do not need proprietary cartridges. You can use any standard Luer Lock meso tip needle suitable for your skin booster.
However, a handy option is the Compuvon adjustable depth single needle. These allow you to adjust the needle length up to a maximum of 4mm by twisting the housing. The catch: Just like the 9-pin cartridge, there are no explicit depth markings on the plastic hub – you have to completely eyeball the length as you twist it out. But once you set it, it allows you to “hub” the plastic base flush against your skin in Vac Off mode, giving you the precision dosing of the machine with the absolute stabilization of a depth-stop.
Part 2: Operating the Device & Syringe Interface
Once your supplies are gathered, the first mechanical hurdle is loading your product. Because the EZ Injector uses a motorized drive rod instead of a traditional syringe plunger, it requires a direct mechanical connection to the syringe’s rubber stopper. Fortunately, once you understand this unique design, loading the device is straightforward.
There are two common ways to prepare a syringe for the EZ Injector, depending on the type of product you’re using.
Option 1: Filling an Empty EZI Syringe
If you’re mixing a custom cocktail or drawing product from a vial, begin with an empty proprietary EZI syringe.
- Thread the syringe’s rubber stopper onto the EZ Injector’s metal drive rod, then slide the syringe downward until the finger wings are fully seated at the bottom of the rod. Screw on the clear plastic retaining cap over the syringe; this cap presses against the finger wings, holding the syringe securely in place while the motor advances and retracts the drive rod.
- Attach a large drawing needle (an 18G works well) to the syringe.
- Insert the needle into your vial.
- Press and hold the Reverse (Down) button on the injector. As the motor retracts the rubber stopper, it creates suction and draws the product smoothly into the syringe.
- Once you’ve reached the desired volume, remove the drawing needle and attach your injection needle or cartridge.
If your product is already in another syringe instead of a vial, simply replace the drawing needle with a sterile Luer Lock syringe-to-syringe connector. The process is otherwise identical – the EZ Injector will pull the product directly from one syringe into the other.
My Tip: Some users remove the rubber stopper and fill the syringe from the back. Personally, I don’t recommend this approach. It introduces a large air pocket that must later be purged, and I’ve found it often wastes product as the air pocket is on the wrong side of the booster to be easily released. Using the injector itself to draw the product into the syringe is cleaner, easier, and much more controlled.
Option 2: Modifying a Pre-Filled Syringe
Many pre-filled skin booster syringes can be adapted for the EZ Injector (for example Hyaron and Youthfill PN). Firmly grip the syringe barrel directly over the black rubber stopper to keep it from moving, then carefully unscrew the original plastic plunger rod while leaving the rubber stopper in place. The syringe can then be threaded directly onto the EZ Injector’s metal drive rod. Depending on the brand, you may also need to remove the plastic finger grip so the syringe fits properly into the device.
Crucial Screen Calibration Rule
Always make sure the syringe size physically installed in the machine matches the syringe size selected on the screen display (1 cc, 3 cc, 5 cc, or 10 cc). The EZ Injector calculates plunger travel based on this setting. If the physical syringe and digital setting don’t match, every injection will be proportionally under-dosed or over-dosed.
Vacuum On vs. Vacuum Off Modes
The EZ Injector completely changes its operating profile based on how it is physically configured:
- Vac Off Mode (Single Needle): If you pull the main electronic control unit completely out of the plastic gun handle, it will automatically operate without the vacuum suction. You can easily verify this by looking at the bottom right corner of the screen, which will read “Vac Off.” This standalone setup is what you want to use for single needle modes (like BAP or manual spot injections).
- Vac On Mode (Multi-Pin Heads): When you slide the main device firmly into the gun handle, it switches into “Vac On” mode. This mode is explicitly designed for multi-pin needle cartridges, and requires the vacuum tube and filter installed between the device and the pin cartridge. Make sure the hose connector is “up” on the cartridge. The vacuum creates suction to pull the skin taut against the needle plate, ensuring even depth.
You should never try to use a standard single needle while the device is attached to the gun handle. Trying to fire a single needle with the vacuum running creates a massive risk of drawing fluids or blood directly into the internal vacuum lines, which can permanently ruin the motor. Always pull the main unit out for single needle work.
Part 3: Dosing Math & Device Settings
Setting up dosing can be confusing, so let’s walk through it. The EZ Injector displays doses in microliters (uL), while our syringes and product vials are labeled in milliliters (mL).
The math is actually a simple factor of 1,000:
- 1,000 uL = 1.0 mL
- 500 uL = 0.5 mL
- 250 uL = 0.25 mL
- 100 uL = 0.1 mL
When you set the Dose mode on your screen, you are telling the internal motor exactly how many microliters of fluid to push out per single trigger pull.
If you are using a single needle, this is quite easy math to set your dose. Where it gets more complicated is when you use a multi-pin cartridge. When you set a dose of 200 uL (0.2 mL) on the screen, that is the total amount of fluid pushed out of the syringe barrel into the needle cartridge. But that total volume doesn’t come out of a single hole. It is forced through the plastic hub and divided across every single needle pin on your cartridge.
To find out exactly how much product each individual puncture point is getting, you have to divide your screen dose by the number of pins you are using:
Actual Dose Per Pin = Screen Dose divided by Number of Pins
The Multi-Pin Math Cheat Sheet
If you set your EZ Injector to a dose of 200 uL (0.2 mL), look at how drastically the actual micro-drop size changes based on your needle choice:
- Single Needle (1-pin): 200 uL setting = 0.2 mL total fluid = 200 uL per hole
- 5-Pin Cartridge: 200 uL setting = 0.2 mL total fluid = 40 uL per hole
- 9-Pin Cartridge: 200 uL setting = 0.2 mL total fluid = 22.2 uL per hole
The Takeaway: If you switch from a 5-pin to a 9-pin cartridge but keep your machine settings the same, the total product used per stamp doesn’t change, but the amount of product entering each individual puncture hole drops by more than half.
Many people doing manual meso are used to depositing small aliquots of 0.25mL per spot. Setting a 9-pin to 200 uL delivers 22.2 uL per spot, making it the perfect match for that classic manual technique.
Recommended Baseline Settings
These are just suggestions for starting out. Adjust as you go depending on your preference and product behavior:
- Single needle for BAP: 200ul
- Single needle for facial fat dissolver: 150ul
- Single needle for body fat dissolver: 250ul
- 5-pin for watery products: 150ul
- 5-pin for thicker products: 200ul
- 9-pin for watery products: 250ul
- 9-pin for thicker products: 300ul
Note on Continuous Mode: The EZ Injector also features a “Continuous” mode. This setting will simply push the syringe plunger forward as long as you hold down the trigger, and will not stop until you let go. You can adjust the speed at which the fluid flows out by tweaking the Amount setting on your interface.
Part 4: Selecting and Customizing Your Products
One of the tricks to mastering this machine is finding products with just the right viscosity. If a product is too thin and watery, it is prone to retrograde leaking (oozing right back out of the skin). If it is too thick and gel-like, it creates immense backpressure and simply won’t come out through the multi-pins at all.
Hyaron is your best friend here. Because Hyaron is a smooth, non-crosslinked hyaluronic acid with an ideal, silky slip, you can use it as a master stabilizer for your custom cocktails:
- To Thicken: Mix a little Hyaron into watery, thin skin boosters to add some body and weight, which helps prevent them from leaking out of the needle tracks.
- To Thin Out: Mix Hyaron into denser, high-viscosity products to slide the texture into that sweet spot, allowing it to pass smoothly through a 5-pin or 9-pin cartridge.
Planning Note: Whichever way you use it, remember that you are technically diluting your active skin booster when you mix in Hyaron. Be sure to calculate your total volume and adjust your treatment map accordingly so your skin still gets the exact dose of actives you intended.
Products To Avoid with the EZ Injector
Because there is absolutely no way to manually aspirate (pull back to check for blood) with this automated device, you need to be incredibly safe. Only use boosters that carry a low risk of vascular occlusion.
It’s also not suitable for use with products that require precision placement at highly specific manual angles.
- No Neurotoxins.
- No Dermal Fillers.
- No PCL / PLLA / PDLLA.
Part 5: Advanced Troubleshooting & The Art of the Stamp
I held off on buying this device for quite a while because I read that many people had mixed or bad experiences. However, after deep-diving into various video tutorials, community forums, and user comments, I gathered the best community workarounds and put them to the test. Through that real-world trial and error, I’ve rounded up a few core techniques and protocols that completely change the experience, eliminate the most common complaints, and keep your treatment flowing smoothly.
1. Hickies & Bruise Avoidance
The device’s vacuum can be fairly fast and rough when pulling up your skin to meet the full depth of the needles. If you just lightly rest the cartridge on the surface of the skin before pulling the trigger, the suction feels very aggressive, and you are highly likely to get a “hickey”-style red bruise that takes several days to disappear.
The Fix: I make this a zen moment by going slow, intentionally focusing that I feel all the pins on my skin and they are straightly aligned, then I manually press the tip of the needle pins firmly into my skin before pulling the trigger. Bringing the skin onto the needles first means the vacuum doesn’t have to violently snap the tissue upward. It still creates a tight seal, but it isn’t as damaging. This is particularly relevant on the face where the skin is tighter and has more bony angles. On the neck where the skin is naturally looser, the vacuum catches easily without these issues.
2. Eliminating the “Idle Ooze”
A major problem people face is that product will slowly ooze out of the pins or needle tip in between injections while the gun is just sitting in your hand. This happens because the plastic syringe barrel and rubber stopper act like a pressurized spring, continuing to force product forward even though the motor is idle.
The Fix: When I notice this type of leaking, I briefly double tap the manual reverse button on the bottom of the EZ Injector control pad immediately after a stamp. Backing the plunger up a mere fraction of a millimeter instantly breaks that internal pressure vacuum and stops the ooze dead. Just remember to tap it forward again before the next skin placement so you aren’t injecting an empty pocket of air. Leaving the pins lingering in your skin for 1-2 seconds after the dose is dispensed also allows the pressure to equalize into the dermis before you break the seal.
3. Cartridge Longevity & Multi-Zone Rules
A common question when planning a session is how long a single multi-pin head will last. A standard full-face treatment requires roughly 40 to 60 stamps, and moving down to the neck adds another 30 to 40 stamps. Because surgical-grade stainless steel needles are incredibly resilient, a single cartridge easily retains its sharpness for a full, multi-zone session covering your entire face and neck.
However, to ensure flawless performance when transitioning from your face down to your neck, use this two-step “Zone Change” Protocol:
- Wipe the Needle Plate: Take a sterile gauze pad dampened with alcohol or chlorhexidine and gently wipe the flat plastic plate of the cartridge between zones. Skin cells, sebum, and slightly dried booster product can form a thin film on the plastic, which can subtly disrupt your vacuum seal on the neck.
- The Vacuum Purge: Hold the device over a sterile wipe and trigger 1 or 2 test shots in the air before touching your neck. This clears out any lagging, pressurized facial serum from the internal hub of the cartridge, preventing a pressure delay on your next stamp.
When should you swap heads mid-session? Only if you change product viscosities (e.g., switching from a thick facial gel to a watery neck booster that won’t mix well in the hub), or if you accidentally press too hard against a prominent bone (like the jawline) and blunt or “hook” the microscopic tips. If the device suddenly begins to feel significantly sharper or snags the skin as you lift it away, swap the cartridge immediately.
4. The “Advanced 9-Pin” Protocol for Thicker Boosters
I can successfully run a 200ul dose of a hADM (like Elravie Re2O) if I apply the proper “art of the stamp” protocol:
- Pre-Push: Firmly press the pins slightly into the skin before triggering the dose to form a tight pressure gasket.
- Set Speed to 2: Turn the injection speed down to 2. A slower, steady motor push accommodates the high viscosity and prevents the machine from hitting an over-pressure jam.
- The 2-Second Linger: Do not lift the gun the moment the motor stops whirring. Leave the needles completely inserted in the skin for 1 to 2 full seconds to allow the built-up internal barrel pressure to dissipate naturally into the tissue.
5. Stopping Vacuum Line Flooding
Some users notice that when using the vacuum with a multi-pin cartridge, the liquid booster starts leaking and getting pulled backward down into the clear vacuum tube toward the filter.
The Fix: Always attach your cartridge head so that the vacuum tube port sits on the top of the cartridge layout, not on the bottom closest to the filter outlet. Giving the tube that slight rise in altitude completely removes the gravity and pressure pull that causes the product to wander into the lines.
You can also try the “Idle Ooze” tip to double tap the back button to remove the pressure; this is only needed if you are pausing a bit between stamps.
Part 6: Frequently Asked Questions (FAQ)
1. How do I prep my skin? Do I need to numb?
Yes, a topical numbing cream (like 10% Lidocaine) applied 20-30 minutes prior is highly recommended, especially for the multi-pin cartridges or when working on sensitive areas.
The Workflow Tip: You must completely wash and wipe away all traces of the numbing cream with soap, water, and an alcohol or hypochlorous acid wipe before you begin. Any leftover greasy residue on the skin will get drawn into the vacuum cartridge, slicking up the needle plate and instantly ruining your vacuum seal.
2. How do I sanitize the actual machine between uses?
The needle cartridges are single-use sterile items – throw them away immediately after use. However, the clear PVC vacuum hoses can be safely reused across multiple sessions as long as they stay clean, dry, and free of any back-flowing product. To sanitize the hardware between sessions, thoroughly wipe or spray the plastic gun handle, the main control unit housing, and the metal drive rod using 70% isopropyl alcohol wipes or a hypochlorous acid (HOCl) spray or wipe. Let it air dry completely, and never submerge any part of the electronic unit in liquid.
3. I pull the trigger, I can hear the gears trying to strain, but the rubber stopper isn’t moving forward and nothing is dispensing. What’s wrong?
Your product is simply too thick or viscous to be forced through the tiny gauge of the needle or multi-pins you are using. The fluid resistance inside the hub is higher than the mechanical push of the motor. Because the EZ Injector is a straightforward, budget-friendly device with few electronic bells and whistles, it won’t beep or show a clear error screen when this happens – the motor will simply stall and silently freeze under the pressure.
The Fix: Do not keep pulling the trigger, as forcing a stalled motor can strip or damage the internal gears. Power the device down and apply the Hyaron trick to thin the consistency of your booster cocktail. Alternatively, if you are in single-needle mode, you may need to swap your needle tip out for a slightly wider gauge (like dropping from a 32G down to a 31G or 30G) to accommodate the weight of the gel.
4. Should I see a visible bump or papule at every stamp site like manual mesotherapy?
It depends entirely on your needle selection and product viscosity. With a single needle in Vac Off mode, you will likely see classic, neat little papules. However, with a 9-pin cartridge and a watery booster, you generally won’t see distinct, isolated bumps. Instead, you’ll see a generalized plumpness and slight surface dewiness. This is because the 9 pins distribute that same liquid volume into microscopic micro-droplets across a wider surface area, allowing it to absorb into the tissue almost instantly.
Part 7: Visual Learning Tutorials
Before running your first treatment session, I highly recommend watching these excellent real-world video tutorials to see exactly how to physically assemble, program, and manage your device:
- DIYSassySkinLab
- EZ Injector – Quick Setup and Tips: Watch on Rumble
- EZ Injector Part 2: Easy Programming & Dosing Setup: Watch on Rumble
- TheDIYBeautyLab
- EZ Injector – DIY Mesotherapy Machine: Watch on Rumble
Here is the official manual: PDF